
Are you tired of rainwater wreaking havoc on your home’s exterior? Well, fear no more. We’ve got the ultimate solution for you – installing rain gutters. Whether you’re a seasoned DIY enthusiast or just looking to save some hard-earned cash, this step-by-step guide will walk you through the entire process of adding these ingenious systems to your home. Get ready to bid farewell to water damage and hello to a charmingly protected abode. So, grab your tools, and let’s dive into the world of rain gutter installation together.
Assess Your Home’s Needs
 Before diving into the installation process, conduct a thorough assessment of your home’s requirements. Consider factors such as the roof size, the average rainfall in your area, and the type of landscaping around your property. These factors will influence the size and capacity of the gutters you need. Additionally, identify optimal downspout locations to direct rainwater away from the foundation and landscaping. Take note of any obstacles or unique features, such as chimneys, vents, or corners that may affect the gutter installation. This initial assessment is crucial for selecting the right materials and planning an effective gutter system tailored to your home’s specific needs. Gutters Destin company can assist with this process and provide recommendations for your specific home.
Gather the Necessary Materials and Tools
Once you’ve assessed your home’s requirements, gather all the materials and tools necessary for the job. This will likely include installation material (insulation, vapor barrier, etc.), a utility knife, staple gun, caulk, and any necessary safety equipment. You may also require measuring tape, a ladder, and a hammer. Depending on the specific project, you may need additional tools and materials, so make sure to research and plan accordingly.
Install the Gutters and Downspouts
With all materials and tools on hand, it’s time to begin the installation process. Start by attaching the gutters to the fascia board using the hangers and brackets. Ensure they have a slight downward slope toward the downspout to facilitate proper drainage. Use a measuring tape and level to guarantee accuracy during this phase. Connect the gutters using end caps, corner pieces, and connectors, securing them with screws. Pay close attention to corners and joints, applying sealant to prevent water leakage. Once the gutters are in place, attach the downspouts, directing them away from the foundation and ensuring a smooth flow of water.
Test the System
After the installation is complete, it’s crucial to test the gutter system to ensure proper functionality. Use a hose to simulate rainfall and observe the water flow through the gutters and downspouts. Check for any leaks, misalignments, or areas where water may pool. Make necessary adjustments, such as repositioning hangers or adding more sealant, to address any issues identified during testing.
Regular Maintenance and Inspection
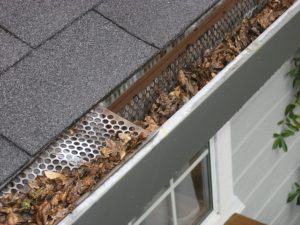
 Installing rain gutters is not a one-time task; regular maintenance is essential to ensure their continued effectiveness. Clean the gutters and downspouts regularly, removing leaves, debris, and any other obstructions that could impede water flow. Inspect the system for signs of wear, rust, or damage, and promptly address any issues to prevent further damage. Installing rain gutters is a practical investment in the longevity and integrity of your home. By following these five steps, you can safeguard your property from potential water damage and enjoy the peace of mind that comes with a well-designed and properly installed gutter system. Taking the time to plan and execute this essential home improvement project will pay off in the long run, protecting your home and preserving its value.